Ethereum’s ETH 2.0 validator “launchpad” is live, here’s how to run it

Cover art/illustration via CryptoSlate. Image includes combined content which may include the use of AI tools.
Ethereum’s much-awaited validator testnet was launched yesterday, as per a release on the site’s official blog.
Interested members and teams can now test validators ahead of the Medalla multi-client testnet launch, in what marks a historic milestone in the history of the Ethereum network.
The development comes after “months of hard work” from the ETH 2.0 research team, along with Consensys and DeepWork Studio.
Accept all risk, proceed with caution
Ethereum developers laid out the steps required to run a validator in the blog. They also apprised potential users on clearly understanding why the network needs nodes, the risks involved, and estimated payouts before setting up a node.
The main focus was to “make the process of becoming an eth2 validator as easy as possible, without compromising on security and education.” This is in contrast to using a third-party service, where the keys, nodes, and wallets are automatically managed on the backend without needing user intervention.
Ethereum published a graph to detail the projected amount of rewards a user stands to receive.
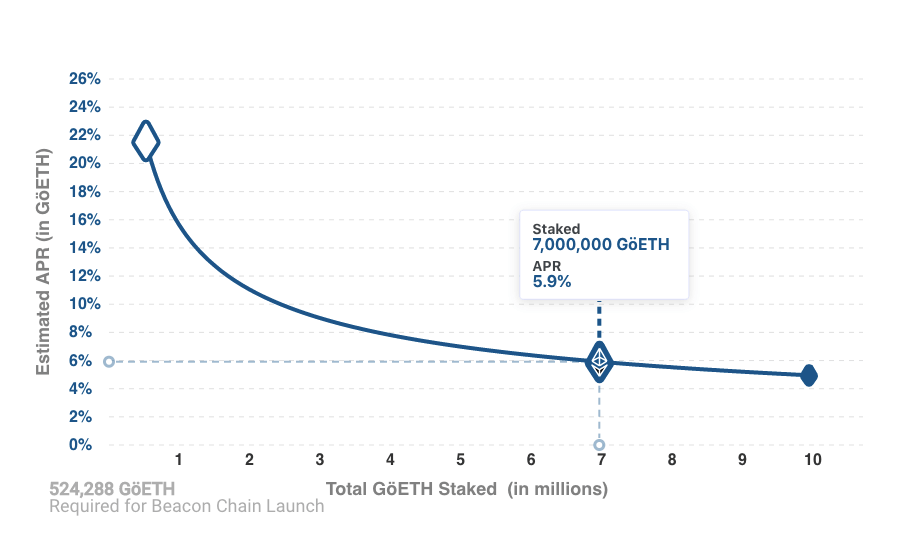
In particular, wrote developers, users must understand that “rewards are not fixed, but dynamic” (a function of the amount of eth staked in the network):
“In plain English, if the total amount of ETH staked is low, the annual reward is high, but as the total stake rises, the reward received by each validator starts to fall.”
After users accept the risks and technical specs required to set up and run their nodes, here are the steps to do so.
Validator 101
First, a dapp instructs users how to generate a separate, interactive command-line interface (CLI) app to generate your keys offline. Choices include Mandarin, Czech, and several other languages. Users will then be asked to set up a password of their choice.

Once that’s done, a mnemonic will be generated. This is the ONLY way to retrieve deposits and interact with the network. It must be duly recorded and stored in a safe place.
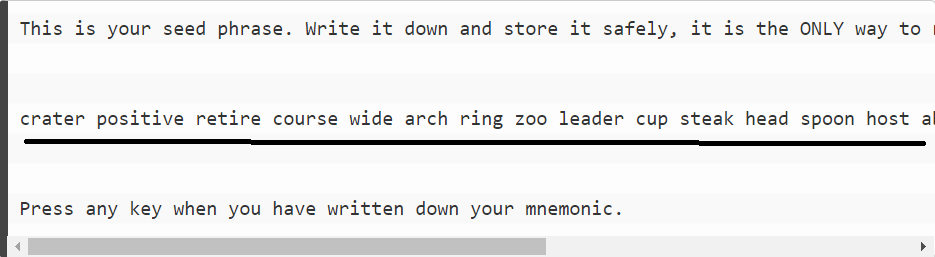
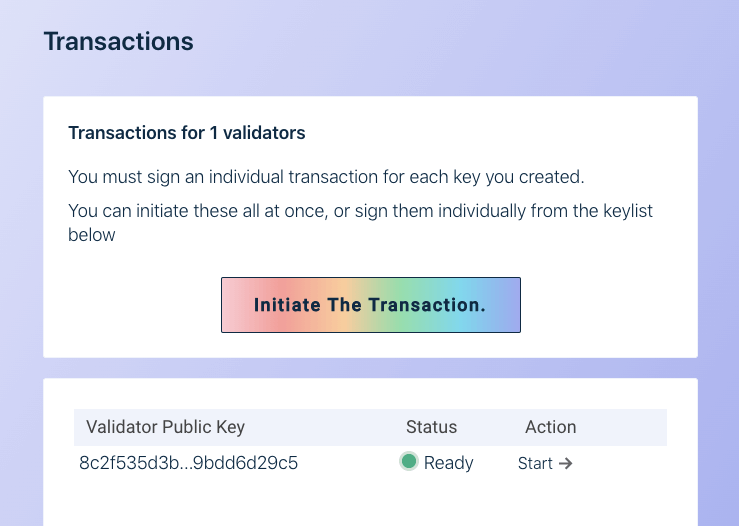
After confirming the mnemonic phase on a screen that pops up next, the network will generate keys for the user. They can then upload your public keys online, where they will then be verified and sent off to the deposit contract.

Data will be verified, and a pop-up drawing user confirmation to the risks involved will appear. Once that’s confirmed, the validator is live!
The next step is to choose a client (the software users need to set up their Beacon Node, import their keystores, and run a Validator).
For now, only four testnet clients are available — Lighthouse, Nimbus, Prysm, and Teku. The blog noted these client teams “won’t have Medalla specific documentation ready until closer to August 4th,” but “now is probably a good time to start doing research on which client (or clients) users want to test out.”

(The walkthrough is available on Ethereum’s blog accessible here.)